Hi, this is Wayne again with a topic “Your Old PC is Your New Server”.
Remember that old PC, you stuffed in the closet, Yeah that one. Today it’s been given a second chance.. This old machine isn’t worthless, even with it’s nine year old CPU and complete lack of a Graphics Card.. Why? I, like you, know a little secret..
Not all PCs need to be for gaming., Tired of paying for Google Drive host your own Cloud. Storage. Hate running USB drives through your TV host, your own media server..

The possibilities are endless., With the help of Pulseway the sponsor of today’s video, we’re going to show you how to repurpose that old rig into your own personal server for cheap or even free., ( techno, music ). The first thing to learn is that servers are just computers.. The word describes a role, not a specific type of hardware. Sure the servers in big data centers do look different than your home PC.

They’re, built for reliability with redundant power supplies and ECC Memory.. They prefer many slower cores rather than a few fast ones, and they lack consumer IO like tons of USB audio or display outputs.. But that’s because they’re serving hundreds, if not thousands, of clients., We are not., Which is why even our aging closet, PC, an old laptop or even a $ 30 Raspberry Pi can all act as our first home server.. This OptiPlex 7010.
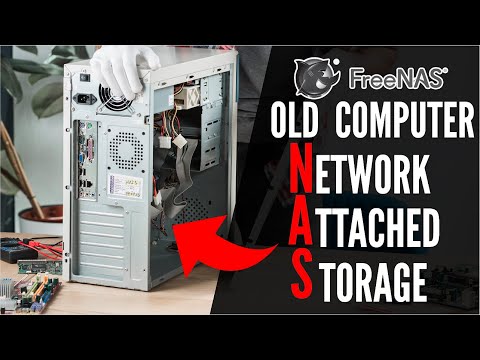
We picked up from our local recycler. Free Geek is the perfect candidate, not just because it’s cheap at 176 US dollars, but because the bones are solid., It’s got a hyper-threading Quad Core Intel: i7 3770, a 128 Gig SATA SSD for a boot drive and a reasonable 1 Terabyte of bulk storage.. At this price point, though, there are some compromises: we have to make., It’s 12 Gigs of RAM are mismatched and predictably, it doesn’t have a GPU., And even if we did add one, we would likely run into issues with the power supply because value engineered power supplies, Like this 250 watt, one while they’re generally pretty solid, they don’t leave a whole lot of headroom to play with, nor does it offer additional PCI Express Power Cables., But don’t fret.. What really matters here is that we have a blank canvas to work from. And by the way, now’s a great time to open up your rigging., Give it a good dusting and maybe refresh your thermal paste, while you’re at it.. It needs some love..
Now, let’s set up our OS. Now before you say it we’re not gon na install Linux today.. We know that moving to a Linux or FreeBSD based option does have both performance and feature benefits over Windows.. However, if you’re, just starting out and you’ve got an old Windows based machine already around, this is the easiest way to get your foot in the door. And that’s what we want this video to be. A start, not the end.. If you guys, wan na see a follow-up where we use TrueNAS or similar rattle your sabers in the comments and get subscribed., The first thing you’re going to want to do is factory reset the PC.. Now, if you’re running, Windows, 7 or 8 now is a good time to upgrade to Windows, 10 or 11., Keep in mind that a lot of those old Windows keys will still work to activate newer versions of Windows..
If you’re already there hit the Windows key and type Reset. Hah, it’s slow., Then click on Get Started.. All you need to do from here is run through the prompts. Until you have a fresh Windows install., We ran WinAero Tweaker to disable automatic updates and kill Cortana and also disabled lot of the extra bloat like Telemetry that can suck away valuable resources from an older system like this..
Now we’re ready to set up our server to actually do stuff.. For starters, we’re going to download Plex Media Server for our media and Pulseway to manage our system remotely. If you’re thinking. Why would I need remote access to this dinosaur? Well, it’s not because we plan on accessing it from across the world, but rather because we may not have a spare, monitor, keyboard and mouse to leave connected to it, let alone the space..
Instead, we can operate it headlessly that is completely controlled via any web browser or the Pulseway app. Neat. Setting up Plex is simple.
Install the application run through the prompts, and definitely read that EULA. Am I right. They are very legally binding.. The beauty of using a Windows PC to start your server hosting journey is that the user experience isn’t – and I mean this with the utmost respect to all command line warriors complete crap usually., You just download what you need.. The links are in the description and install and configure it with a gooey and then you’re done..
It really is that easy.. We can’t cover all the options here of course.. You could run a remote torrenting box or an Ad blocking server for instance., But if you’re following along – and you do hit some roadblocks hop on over to our forum, where there are tons of friendly fellow nerds willing to help you out. Love, you guys. Pulseway, set Up is similarly easy. Just click through the wizard and sign in.. At this point, you’ll have full access to your files and settings from whatever web browser you use to access Pulseway. And we’re done.
Service is running. Pulseway is up.. You can actually get away with not even setting up a network share or anything and just using Pulseway to manage your files remotely., But having a direct folder share on your local network is pretty nice., So we’re gon na do that too.. It just takes a few more steps and you won’t be able to access’em from Starbucks, unfortunately or fortunately..
We’Ve got a drive set up here, called LTT, Simple Server that we’ll go into and we have a folder. We want to share.. What we’ll do is we’ll right. Click and go to Give access to, and then click on specific people.
From here either you can allow only one person to access the file like it is normally or in our case, we’re going to give everyone in our local network access. Be sure to change the Permissions from Read only to Read and Write, creating a melting, pot. And boom. The folder is now able to be added as a Network Share by copying the link into the Add a Network folder prompt in any network machine on your local network..
Don’T forget to go to the Network and Sharing Center to ensure both Network Discovery and File and Printer Sharing are turned on under the private settings. Or if your network is set as public. You should set that as private because it won’t work on public networks, not by default. Double check, that., Really, that’s it for making a basic file server. And with it we can do a litany of cool things..
We can point our Plex server to the storage folders and access the entire drive over the network.. We can set up a Windows, remote, desktop connection or go easy mode and use Pulseway’s built-in Remote Desktop Tool to control our server from anywhere in the world without exposing our IP to the net.. We can also update Windows without having to log in to the system itself, even from your phone.
And the best part is that we’re still running Windows. We’re not running Linux.. You don’t have to learn anything new.. If your main rig works itself, you have an easy to configure backup PC just waiting in the wings..
But what, if you want more control or what? If you don’t have a Windows license to throw at your pile of spare parts., You could run a standalone Linux server, of course, but as we’ve seen in the Linux challenge, that’s not always for the faint of heart., Unraid and Proxmox are also feature rich options, but They’Re not super easy to use either. For an intermediate user. We would suggest TrueNAS CORE previously known as FreeNAS.. It’S free, easy to install and has a decent UI..
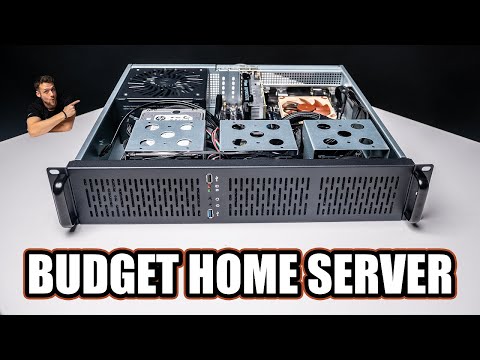
That’S it video over. Nah, just kidding.. Let’S kick it up by adding more storage and data redundancy.. These two 12 terabyte IronWolf Pro drives can handle that beautifully.
At $ 400, a pop they aren’t cheap, but considering that 10 terabytes of Google storage costs 70 bucks a month.. If we did the math, this upgrade will pay itself off in under a year, including the PC, not to mention you will own and control all of your data.. All right. We’Ve got the 1 terabyte drive out and the first 12 terabyte IronWolf in, but now we have a problem..
Where does this go? We can’t exactly like just throw it here and be done with it.. We can’t put it here, there’s just not enough clearance. Like there’s. No provisions. There’s not even another SATA cable, unless ( Anthony, laughs ).
This optical drive now serves no purpose.. Oh, there are some screws in there that I need to get rid of., Ah, okay, cool., But there’s another problem.. Yes, this freed up some room and yes, this is SATA.
Um they’re, not the same size.. So that’s where this comes in.. This will accept a three and a half inch drive like so and slot in something like so., Oh yep, okay..
Obviously I need to actually mount that first, but that’s the plan., Let’s get to it., Let’s see if it still works. Now with the DVD drive out, because who needs one of these. These days we have a freed up, SATA power and data cable right where we need it., So our second drive now definitely screwed in is absolutely plugged into the system and I’m not getting a display..
This is very troubling.. One moment please. Two things that we learned just now.
First always check your cables.. Second, a lot of these old machines sometimes have issues with outputting anything via display port. Yeah.
These are the kinds of things that these old systems will sometimes give you trouble with., But once you have it all set up and running here we go: we’ve got 12 terabytes of storage. Right here. Did, I say, 12, I meant to say 12 terabytes of redundant storage. Yes..
Now it’s time to RAID these things. We’re gon na be setting up RAID 1, which means the drives will be mirrored.. There’S no performance benefit on, Writes anyway for Reads there is., But if one dies you get to keep 100 % of your data. Hit. The Windows key and type “ Storage spaces” Then create a new pool. Using the steps we’ve linked down, below. ( keys, clicking ). You will need to format your drives.
First. Make sure you do that. There. We go.
On format, drives. ( Anthony sneezes, ) Ooh. Ah, I’m allergic to Dell ( beep, ) Storage, space, Resiliency two-way, mirror, yep. File system, NTFS.
Size, so 10.9 terabytes, that’s 12 terabytes. And create Storage, Space. Formatting, the storage space.. We are good to go.
And there we have it a 12 terabyte redundant NASBox for under a thousand dollars., And each of these hard drives costs about 400 bucks.. So that’s telling you something.. This particular form factor is actually really easy to hide somewhere in conspicuous, especially if you use Pulseway to do all of your remote monitoring and maintenance.
So huge thanks to Pulseway for sponsoring this video.. We hope you enjoyed it. And if you wan na see more of this sort of DIY server content, don’t forget to get subscribed and check out all of our other server videos.
We’ll have those linked in the end screen for you.. For now see you later .