Hi, this is Wayne again with a topic “Raspberry Pi Home Arcade”.
The raspberry pi is great for all sorts of small computing applications from 3d printer servers to in-car computing and a lot more. But the pie can also be the beating heart of a classic video arcade machine and who doesn’t want one of those in today’s weekend, project by tyler, weingartner, we’ll be using pi play a distribution of the linux operating system heavily based on the familiar raspbian distro, we’ll Also be using an arduino explorer to create a system that will allow you to play your favorite classic arcade games of the 8-bit era on your raspberry pi you’ll need the following parts: to build your own pie arcade, and these basic tools before you connect the various Components together, you’ll want to get the software set up on your raspberry pi start by downloading pi play it’s a custom distribution of linux, specifically designed to play arcade and classic rom images. Stop by the project page for more information about pi play along with links to download the latest version of the software, while you’re waiting for the download to complete it’s a great time to format your sd card. There are several options when it comes to formatting your card for a raspberry pi again. The project page is a lot more info on the various options.
Once you have the sd card all set up, you can fire up your raspberry pi. It should bypass the config page and boot directly into the emulation hub. You’Ll still want to take a moment to set up your pi, ensuring that your keyboard is set up properly for your region and that you have the full size of your sd card available to the partition. Thankfully, there’s a link straight to the raspi config in the emulation hub with a keyboard use the arrow keys to navigate to the last page to launch it first expand the file system.
It’S the first thing you see in the config menu next you’ll want to configure your region so that your keyboard behaves the way you need it to go to internationalization options and set your locale and keyboard settings now. Exit the raspi config dialog confirm that you want to reboot and make sure you have a working network connection before moving on now, you need to install the multiple arcade machine, emulator, better known as main, navigate to the install name icon from the pi plane menu and Select it installation will take a few minutes and then the pi play interface will reload once maim is installed, you’ll be able to load games onto your raspberry pi. The game files are stored in rom images. These images constitute the software found on an arcade, machine’s, integrated circuits or a home game.

Console’S cartridge, keep in mind that, while maim is free to download and use the rom images are not necessarily free or legal to use. Fortunately, there is also a small repository of free roms available from the main website be sure to head over to the project page for links and more information about this project. Once you’ve downloaded a few roms to your computer, look at pi play in the upper right hand, corner of the interface to find the ip address of your pi on your computer type. In this address on a web browser to bring up the pi play, remote manager, click on rom uploader and select the uploader for advanced main drop, your rom zip files into the window and allow them to upload. Finally, you’ll need to scrape the roms you just uploaded. This installs them for use in the emulator you can find the rom scraper in the pi play interface in the last page. Now you’ll need a controller for your games on your computer, open the arduino, ide and upload the modified explorer sketch the arduino sketch is an adaptation of the esplera cart example sketch it remaps a few keys to ones commonly used in the main and pi play interface. Additionally, you’ll custom map a few of explorer’s buttons, which are not mapped in the example sketch the joystick control maps to the arrow cursor keys on your keyboard.
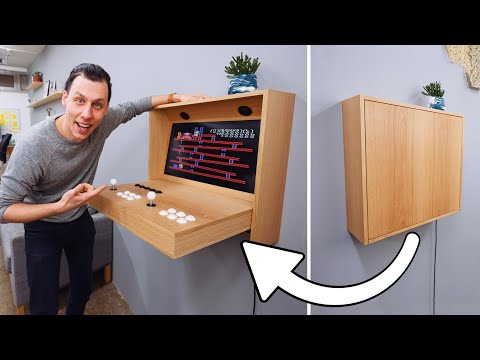
The bottom button acts as the left control key and the right button is mapped to left alt key. The left button is the space key and the top button is the enter or return key to press escape, allowing you to quit a game flip the explorer over and back quickly, finally, to press the tab key, which will allow you to customize the controls for each Game in the emulator slide the linear potentiometer to the right and quickly back to the left. Now that the explorer is configured all you need to do is plug it into one of the pi’s usb ports select advanced, main and load up the game you want to play. How could you take this project further? How about adding a second explorer for two player action – or maybe you prefer those classic arcade joysticks and don’t forget – to build a custom cabinet to keep your project safe? There’S a ton of potential for modifying this build be sure to head over to the project page to learn more about this project. It’S also a great place to share your own, build whatever you decide to do, have fun and game on bye. .