
Hi, this is Wayne again with a topic “It’s more work, but it’s fun! – InWin POC”.
Anyone’S been making some cool build your own cases recently Alex built the Dilly in uh compex. Now we’ve got the PAC, which apparently doesn’t actually stand for anything. So let’s make our own name and Convention how about personally organized case thanks inwin it comes in two colors. We’Ve got the tropical sweetheart or race blue. I don’t know why this one gets the actual color and this one just says tropical uh. I guess I just get to pick one if you couldn’t tell they’re flat pack, which is actually really cool. It’S kind of like the IKEA furniture of cases, ooh they’ve got all these assembly instructions on the box, there’s also an app to follow in case you don’t have the box for whatever reason, maybe you buy it secondhand or something, and everything just comes in these.

Like really flat sheets of secc Steel, which is pretty cool, we’re going to supposedly fold it like origami, that’s what their marketing material says at least anyways front panel, how to fold everything’s very clearly labeled – and I like that this is just uh. I don’t know if it’s recycled already, but it’s just paper. It’S just card like not cardboard, uh card stock or something so you can easily throw it in the recycling once you’re done. Although I mean it’s got the instructions, so I don’t know if you want to get rid of it, we’ve got our side cover, we’ve got our front panel rear panel, MB or motherboard plate side cover one of two top panel and bottom panel. Hey where’s. My side cover two of two well, okay, we’ll we’ll find out.
I guess maybe they’re together or something it’s not that heavy. It gets to be about 8.82 lb and it’s a mini ITX build. So we’ve got our r stxs b 760i gaming, Wi-Fi that we’ll throw in that later, but I want to build this case.

We get a few other things here. There’S these metal rails, maybe to hold it. We get some cable ties and zap straps, which is always nice for cable management.
We also get a fan, so you get one fan with your case, which is okay for ITX. It’S not bad. We also get some of these little yeah.
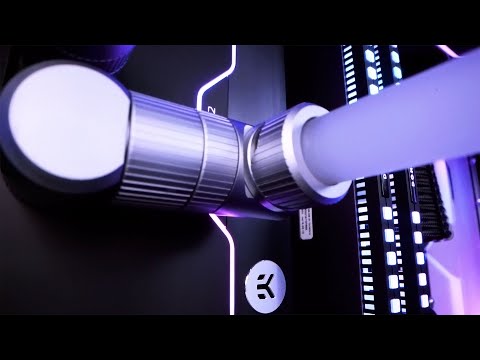
These look like little rubber feet that you throw on on the end, we’ll find that out later, we also get a handy dandy accessories box, always appreciated, as well as our pcie Gen, 4 Riser cable. Oh, it’s both the Riser and the io module in here, apparently or maybe they just use the same box yeah. Maybe they just use the same box cuz. This one says IO module. Now I don’t know what to believe. Let’S see what we get in our accessories box, though: okay just some foam to stick uh, I don’t know what this little foam is for either and then our screws and what looks like our standoffs and mounting hardware and uh pcie slot screws, let’s see which is Which here is our oh? This is the I/O. We get one USBC, which is 3.2 gen 2×2, as well as two 3.2 gen, 1 usba a ports along with our little headphone mic combo Jack.
This one must be our Riser, then yeah, very nice. If you don’t want to follow the instructions that come on the box, there’s an app fold, assemble build part one fold: oh, that’s, really cool seven panels to bend uh, so you just like Click on each one and then it gives you a little uh video on How to fold it? Let’S follow this thing, step by step, we’ll start with the MB plate. Why didn’t they just say motherboard one minor thing: this is like waxed or something on the inside, so I don’t know how recyclable this is anymore. It’S got this side on the bottom and then you fold these in and then this flap okay. This is great, but it moves a little fast. How do I rewind? Do I just go back and back in yep? Okay, oh there’s this tab. I forgot about this. Go here very cool, okay and then this folds out this way. So then we flip it out this way and then we throw some screws in here and then P1 motherboard standoff time, 6 cool, that’s the last step looks like the next step is to tell you about this message from our sponsor, thanks to chos Fox for sponsoring. Today’S video available as a fully pre-built keyboard or a barebones kit, the Leo 80 tkl mechanical keyboard, is anything but your average off the shelf board available in a bold old anodized, black, a beautiful anodized blue and an Exquisite eced white.
This thing is built like a brick, of course, it has features, you’d expect like hot swappable, key switches and per key south facing RGB, but it even has side profile RGB, with connectivity options of bluetoo 2.4 gig Wireless and wired USBC. This board really is a versatile, immaculately constructed statement, piece check it out using the link below. What’S next handy dandy, Guide front panel, the F panel, my favorite panel, looks like this one’s pretty easy Pock I build. I share. I build computer looks like you fold it in. I just want to make sure I’m folding them the right way. I did because look on the video. You can see the color on one side so that actually makes it really easy to tell that you’re on the right side.
That’S what I’ve been looking for at least anyway is just which side is the paint on. We need our rear panel next yeah. I do love how it’s got like the howto fold right on the box, that is Handy uh. Maybe don’t throw away your your box if you think you’re going to be disassembling and assembling over and over again.
One kind of minor thing to note, though, is that this is metal and it’s going to wear out, so you probably only have so many bends in this before it just starts to snap this one’s a little harder, cuz, there’s no paint. My method has been foiled. That’S supposedly the rear panel side cover. Oh, that was good. Oh, this is super cool uh. So what you can do with these is, you can basically uh do whatever pattern.
You want cuz, it’s for air flow, I’ll, get it assembled first and then I’ll choose which ones to like pop out top panel ooh. I love this blue, the tropical sweetheart. You get a bit of everything. You know you get these yellows or oranges.
You get this green, you get some blue, it’s nice, whereas with the blue eraser, it’s just blue and black, which hey that’s an aesthetic in and of itself, but it’s not what we’re looking for today. I am like terrified every time I bend these and I’m going to break something, but nope somebody ordered a pizza ball, this one’s kind of weird we’ve. Actually, this is like the first one where I’ve had to actually do multiple bends, I’m actually enjoying myself quite a bit. It’S a lot of fun.
I’Ve been doing a lot of like mini assembly and painting and stuff recently, and it’s been a joy kind of just putting small things together and I don’t really build ITX, but I might get that ATX version next time I buy a case cuz. This is really cool all right. You hit the done step and then look. It’S seven pieces. 1. 2. 3. 4.
Five, six. I have six where’s my other side panel, seven, that we totally totally forgot to fold. You know they only have one step for side panel.
Even though you got two of them, I just wasn’t thinking about it. We’Re going to take our bottom plate we’re going to take our MB plate, we’re just going to kind of squeak it in here everything’s got a little like cutout, where it should go, which is nice, oh, these go on the outside. This is why you follow the instructions. This says that it comes with tools and accessories, but I don’t see a screwdriver anyway. The wind blows.
Okay, that’s done w! Oh good job, careful, it’s a little flimsy until it’s like really all together. Okay! So then I take the perforated this guy and it’s going to slot in around here. Somehow it looks like line up these holes very good. Then we’re going to take our other side panel right here and we’re just going to screw this in to kind of like complete the little graphic here.
I understand why we put these two up top here. It’S for the I/O, so we’re just going to screw those into these little standoffs here and away. We go. I just realized. This is a power button, something that’s not clear unless you’re following the guide, maybe it’s clearer when you f the instructions, but these uh panels. I don’t know sometimes if they go on the inside or the outside.
So let’s just watch this little guy here on the inside on the inside this time see it’s so they have it putting the handle on first. I think that’s way harder to do. I’M just going to put these screws through first instead, as for the handles themselves, it’s hard to tell you know without everything in here, but I like them, I don’t have the smallest hands or the beefiest, and my fingers can fit in here. Looks like our next step is our PCI Riser okay, take that out and then this is going to go right here, feed that through and then take a couple more standoff, screws we’re almost done. Basically, all we’ve got are our two side panels here we’re just going to slot these in and then screw them in on both sides. It’S pretty cool one thing we kind of realized, though, before we put these side panels on.
Is that uh? You can’t really. You know once they’re in you can’t get in there and I’ve still got to put a computer in this thing. They don’t tell me anywhere on the instructions I got so carried away in their cool Pock, app that I completely forgot to build the computer. So we’re going to build a computer now, okay, we’re just going to pop a riser Cable in now that we’ve got our cooler and our motherboard in here, and I got to say starting to look pretty good, I’m not 100 % sure we’ll have enough clearance! Oh yeah, we’re good we’re good we’re good we’re good, we’ll attach all our IO we’ll get our graphics card in on the other side, just screwing in our power supply here probably should have plugged the other stuff in first, but you know we’ll get there uh the Nice thing is because this thing takes fulls sizee components.
Look at this. We don’t need an sfx power supply, it’s so big! Now they say you can fit a 346 mm long card up to 3 and 1 12 slots, which is pretty bigy pretty beefy. We got a 4070 TI here we go now. It’S clicked something I got really worried about.
Real quick was how I’m going to actually screw this down into the plate. That’S way down here. They give you a little slot, so the stubby is not going to work. That’S for sure, but big boy long screw will totally fit that’s in there pretty good.
You know we got our handles to move it around. Actually really do like these handles quite a bit. Now that I’ve got them. Cable Management could use some work. I not going to spend a ton of time, cable, managing but there’s plenty of room because it’s got two Chambers, so the GPU is on the other side, nice and tidy. Just like this, do whatever you want, you got lots of space as for like overall feel and quality. I don’t have the side panels on yet, admittedly, but it does feel a tad flimsy. I mean, let’s be real here.
It’S 8 mm thick secc steel. It’S just kind of held in by screws in a few places with some bends, but let’s put the side panels on before. We really judge it too harshly. It does look cool.
I really like it. It’S super colorful. Like that’s one complaint I have about building computers. These days in general, you either do RGB or it’s all black or it’s all white, it’s kind of it. There used to be a lot of colored components, whether it was cases or motherboards or graphics cards, and that just doesn’t really happen that much anymore.
But I would like to bring back color a little bit of color into my life. It’S why I like the fractal pop air so much you can get it in a bunch of different fun, colors um, and that’s why I really like this guy. It’S still a little flimsy, but realistically you’re not going to move this once it’s done. Um you’re just going to put it down somewhere and leave it be so yeah. It’S pretty sweet.
You’Ve got your all your HDMI ports, whatever you’re going to put there and then just kind of pop them out the sides here or over here. If you want and then oh the feet, wow that’s great eye build. I completely forgot to customize my cooling, so you know I’m just going to take a slot, screwdriver and just kind of goop to get these out, because I cannot reach them now that the panel is on every single one. That’S what I want to do. Don’T do it this way, I’m probably scratching a little bit of paint. Actually I really like this. I think it’s a pretty cool idea. Uh lets you just kind of added a little bit of flare to your computer. Maybe you just want to do the side ones. Maybe you just want to do the top wow, it’s pretty snazzy.
You know it is the tiniest bit flimsy, but I don’t think that’s a real problem unless you’re lugging around your PC everywhere, which I mean I guess, can be kind of the point of small form factor. If you want to use it for land parties or something Belle says, this is more medium form factor, and I guess I kind of agree. It is a little tall. It’S a little thick like H.
For instance, I built in the uh ghost – and that is like 2/3 of this size at least maybe over. Overall, I think the construction is pretty decent. Putting it together was actually really fun. I don’t know how many people are actually going to enjoy that as much as I did, I kind of like these Nifty little fan things that you can pop in and out for your air flow probably doesn’t do a whole lot.
Realistically, there is a ton of other ventilation on this case and, oh, my God, I forgot about our fan. Normally the fan just goes on the inside here. If you forget, like me, you can always just you know, strap it to the outside and then R, the cable. Somehow, if you want to buy the whole thing, it’s $ 95, which consider in case prices, keep going up and up that’s not too bad, and if you want to you, can mix and match and buy individual panels uh. So you can kind of create your own design, one piece at a time. Do I recommend it honestly yeah if you want to build a new kind of medium to small form, factor PC and you want something that looks colorful and you feel like you’ve done it yourself, then uh the pock could be for you thanks for watching. If you want to watch other case short circuits, Adam built the q500 from Cooler Master recently, it’s another DIY build your own video check it out. .