
Hi, this is Wayne again with a topic “How to Upgrade The Mac Pro”.
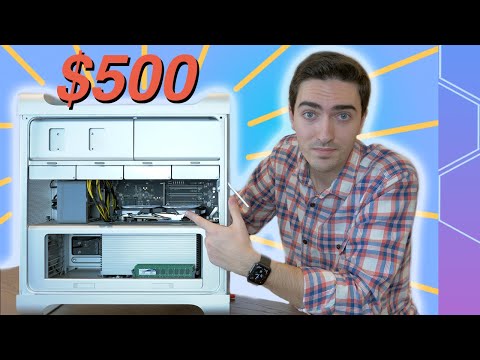
Hey, what’s up folks how’s it going. This watch hope you guys are all doing well, and this is the new generation mac pro and much like the original power mac g5. That came out almost 23 years ago. This is a full tower pc case. Unlike the previous generation trashcan at mac pro, that was very difficult to upgrade. It is the opposite story over here and even though the uh cheapest version still costs uh just about six thousand dollars which we have over here, uh, luckily pretty much all the major components inside can be swapped and upgraded. Now, if you uh, take a look at apple’s site and uh spec, one out to the best possible performance and specifications possible with the 28 core cpu, the best graphics card, ssd and ram configuration you’re going to be spending well over 50 000 uh for a standalone Pc now uh, if you like, the design, the overall form factor and certainly the build quality of the mac pro – is uh, definitely exceptional and that’s kind of mostly.

I think what you’re paying for you can probably get the most out of your money by grabbing one. That’S more bare bones kind of minimum specifications and upgrading the major components yourself, because uh pretty much all the major components in terms of the ram, the ssd storage, the pci express cards, graphics cards and indeed even the cpu, can be swapped and upgraded for better performance And for future growth, which truly makes this a much better investment and certainly you’re, going to save a lot more money, buying individual components yourself and upgrading them in yourself, then going to apple and getting them to do it for you now. Firstly, in terms of getting access to the internal components, that’s actually really simple and straightforward: you can just remove the outer casing by the top handle itself by simply uh grabbing it twisting it and pulling the outer casing right off simple and pretty straightforward there now. Firstly, one of the easiest things that you can do is upgrade the ram on the mac pro. You firstly want to remove the ram covers themselves, and you can do that simply by unlocking the two latches uh corresponding to each of those ram covers and at the back of the covers. There’S actually an illustration on how you can configure a different sets of ram sticks.
Now we’re going to be just adding a single pair of a 32 gigabyte sticks uh, adding in 64 gigabytes to the existing 32 gigabytes. Now, since we’re installing mixed capacity of six, we want to make sure that the higher capacity is going into the first channel, which is five and eight and uh the other. Two eight gigabyte pairs are going to go into plots three and ten and one and twelve respectively. Now i would highly recommend uh getting the ram by yourself and not uh grabbing the upgrade directly from apple uh, because uh, the uh 64 gigabytes, that we’ve just added over here are cost under 300 versus to get 96 gigabytes of ram.
That we’ve now added. Essentially, uh to our a mac pro uh cost over a thousand dollars uh as an upgrade option from apple themselves versus us, and only cost us three hundred dollars. Now, if you take a look in the description down below you’ll, find more details about which specific ram modules to use and uh more information about the installation process as well now, next, let’s talk about accessing the ssd modules and in order to do so, you do Need to take off two covers at the rear and front, and in order to do that, you want to make sure that you have the bottom ram cover removed and you simply press in and the rear cover releases. And if you press in uh to the uh front of the case side over here, you can a d-latch to the clips. You want to be careful not to break these clips, because i have done that already and uh. We simply push out this front cover and then we have access uh to the two uh ssd module slots over here now we only have one occupied because we have the base configuration when it comes with a single 256 gigabyte, ssd module.
Now there are two inherent problems: uh with these modules uh. Firstly, they don’t use a standardized m.2 connection to the motherboard themselves as a proprietary apple connection and due to the fact that they’re also encrypted by the t2 security chip embedded into the mac pro itself. It’S actually hard to get a third-party or used ssd module for the mac pro and just simply install the os 10 and use it straight away. You do need some intervening, assistance from apple themselves in order to add swap out or upgrade these ssd modules themselves, which is definitely kind of a bummer. But there is some good news you could still use the conventional m.2 ssd drives that you find everywhere out there. For example, i added a one: terabyte sabrint m.2 ssd drive using a m.2 to pci express adapter and for under 200 i got an additional one. Terabyte of storage and that’s definitely a lot cheaper than paying 400 to get one terabyte of storage from apple of themselves. Now we’re just using this one terabyte as extra storage in terms of our performance, we’re getting about uh, three gigabytes, a second in terms of reading.
Right on the blackmagic speed test and that’s definitely a lot faster than the 256 stock ssd module that got around two gigabytes, a second terms of right and 2.8 gigabytes. A second in terms of read now beyond just adding uh extra ssd drives via the pci express connectors, which are plenty available on the mac pro. You can also see that we have two uh sata connections right there.
That means that you can install standard two and a half inch ssds, as well as large capacity three and a half inch mechanical hard drives. If you do need extra space now in terms of improving the graphics capability of our mac, pro i’ve added in a vega 64 gpu from a gigabyte, you can pick these up on amazon for about 385 dollars, which is definitely an awesome deal. It’S going to give you way better performance than the standard 580x mpx module that we have on the stock a mac pro over here, and you can use it in conjunction, which is pretty cool or get rid of the mpx module.
Since you really don’t need it, and the only real caveat is that you are going to need to purchase an auxiliary power, cable kit from belkin because of the eight pin pci power connectors are not standardized as you find in traditional uh pc a base, uh power Supply they’re a little bit smaller and like everything uh with this pc a little bit special and different. So you are going to need to purchase that power connection kit to power up a third-party gpu now in terms of the vega 64 performance compared to the 580x. On the geekbench, a meta score, we’re getting around 61 000 points on the vegas 64 compared to 47 000 points on the standard 580x. And if you take a look at the uh optional, upgrade that you can get from apple themselves for the radeon pro vega 2, which is actually 2 400 extra you’re getting around 90 a thousand points which is definitely faster than the vega 64, but for uh 2400.
That’S certainly a huge uh difference in terms of price and you’re, really not getting that much performance uh compared uh to the standard 580x vega 64 is definitely, i think, the best price to perform its gpu as an optional gpu upgrade uh for the mac pro right. Now now, in terms of some of the other uh scores, if you take a look at the valley benchmark at 1080p, with all the max out settings eight times, anti-aliasing uh, the standard 580x got an average frames per second about 41.9 and we’re getting 72.6 on the Vega, 64, and in addition to that, if you do a lot of video editing uh, you are also going to see a big benefit at there. A 10 minute 4k premiere profile took about 13 minutes 11 seconds to render out with the 580x, but with the vega 64 installed uh. We cut that time down to 12 minutes and 37 seconds now.
Lastly, you can also upgrade the cpu on the mac pro and to get access to the cpu itself. You need to remove the heatsink there’s an outer casing for the heatsink, where it says mac pro over here to remove that you need to remove four torx screws and uh. Once you get access to the heatsink itself, there’s two torx screws that you need to remove. They’Re using a t15 bit and you do need at least a four to five inch extension to get access to those bits since they’re embedded through the cpu heatsink itself. But we’ll leave a description down below where you can find these specific tools. And once you remove those two screws, you get access to the socket and cpu itself.
It’S really simple: to remove the little retention arm for the cpu. Now the stock cpu that comes with the mac pro that we have over here is the intel xeon w3223 chip. It’S an eight core 16 thread processor. Now the socket over here is lga, 36 47 and there’s actually a number of different cpus that you can get right now that will uh work with this as a third-party purchase now uh.
What’S really interesting, if you want to get the 28 core top range cpu, which is actually the intel xeon 3175x processor that has 28 cores 56 threads, you can actually get that on newegg right now for about 3, 200 and theoretically, you could just pop it in To the socket over here and it should work and for thirty two hundred dollars, you have that same uh, seven thousand dollar cpu that apple charges as an optional upgrade and plus, if you wan na, get rid of the existing processor that we have over here. This eight core – you could probably get rid of it for around four to five hundred dollars, meaning for around twenty seven hundred to twenty eight hundred dollars. You can get the best version of the processor for the mac pro and that is probably going to be an insane deal uh compared to everything that you’re going to get on the mac pro from apple. So potentially, if you really want to get the most for your money and want to get the best processor, i would definitely go down at that route, because it’s actually really simple and straightforward to get access uh to the processor itself. Now, in summary, we’ve pretty much spent somewhere around a thousand dollars to upgrade uh the components of the mac pro over here, which sounds kind of ridiculous. Since we already spent six thousand dollars on the baseline version and a seven thousand dollar pc would be absolutely uh.

Mind blowing but uh compared to what you’re getting at with apple. This is definitely a much better. Uh deal certainly a lot more bang for the dollar and i would highly recommend if you do want to get the mac pro, since it’s so versatile and easy to access and easy to upgrade.
I would uh recommend to get the bare minimum essential version of the mac pro that you want right now and then upgrade in the future. Your processors, your gpus, according to your needs and demands, as you mature in terms of the actual design itself, the form factor as well before i think it’s a stunning piece of engineering and the build quality is one of the best i’ve ever seen on a consumer Electronic device it’s made for professionals, obviously and there’s always going to be a little bit of a premium due to that notion. But as we demonstrate it in this article, you can certainly, if you do, have the money and want to get more uh out of your business or whatever you’re going to be using at the mac pro, for i would definitely recommend uh, adding in the different components As you see fit, and certainly going a more third-party direction, uh, you probably went out in the long run uh, certainly when it comes to performance and from a budget uh perspective as well, but really on that guys, that’s really it now, if you haven’t done so Already we uh made a video comparing a pc that cost less than half of the baseline version of the mac pro and performs at double.
The capacity so definitely check out that video, if you’re interested in seeing what the pc world has to offer in terms of performance productivity. Everything like that and if you haven’t done so already make sure notifications turned on so you get our videos once it become available. I want to give you guys a huge thank you for continuing the channel and continuing the support so stuff like this, would be possible and give us a thumbs up and we’ll see you later take care. .