Hi, this is Wayne again with a topic “Creating Narrated Slideshows with iMovie”.
In this article, i’m going to show you how to easily create a narrated slideshow in imovie. If you haven’t already watched my beginner’s guide to apple imovie, you should definitely watch that in addition to this video. Now, let’s get started here in imovie, i’m just going to click on the create new button. It gives me the option of creating a movie or a trailer i’ll go with movie, and it takes me to the imovie basic interface. The next step is to import my media and i’ll, just assume that you already have media in this case, meaning images, photos etc and you’ve already got them on your computer.
If you don’t, you should go ahead and download those from the internet or transfer them from a camera, put them on your computer and then click this button to import media. When you click the button, imovie opens this window that you’re supposed to use to identify the media that you would like to import. And again this article is focusing on a narrated slideshow, so i just need some still images. The default folder that imovie took me to is not the one i’m looking for, so i’m going to have to come up here and click on this folder here and here in the drop down. I have a few different places where i can look for my images that i want to use.
I don’t see my pictures listed here, though so i’ll go to the computer home and browse down, and there is my pictures folder. I double clicked on it to open it up and here are the pictures. I would like to use several different pictures from bryce canyon.
Now, of course, i could double click on one particular image and import it or click once and then click the import selected button. But in many cases you’ll just want to click on each image to look through what you have and decide which images you want to use. In my case, i would like to use all of these images so i’ll hold the command key on the keyboard and tap a to select all now notice. One of these isn’t even an image.
It’S an mp3, in other words, an audio file, but that’s okay, i’ll just click import all and it pulled into my project every still image in that folder, and also there is my audio file. Now, if i had videos in that same folder, those videos would likely have been imported as well and would be listed here. Okay, the next step is to put these images down on the timeline. This may not look much like a timeline, but it basically is. You can see the time length of my project at this point is zero but, as i start dragging and dropping images down onto the timeline that will grow, so i could very meticulously click and drag to put each image onto my timeline and put it just exactly In the right place, in many cases, i don’t feel like being quite that patient, so instead i’m going to click on the image, that’s the furthest down and i’ll hold the shift key and then click on the image. That’S the furthest up in the list. Now, of course, you could do it the other way you could click on the upper left, image hold shift and then click on the lower right image. In this case, this is the furthest down and to the right, because this is just an audio clip either way.
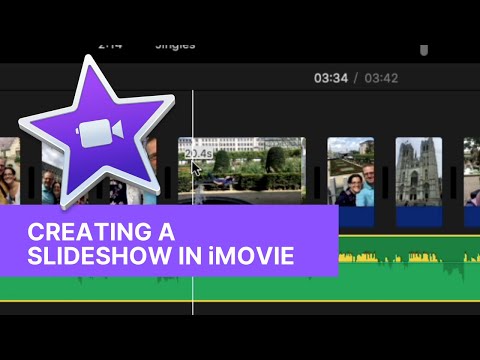
You want to do it, you need to select those images that you want to include and then you can simply click and drag to drop them onto your project timeline. Okay, great, my slideshow is looking pretty good so far to get the best look at it. I’M going to shrink down the view by clicking and dragging this slider. This is the zoom slider and, as you click and drag to the left, it’s like you’re zooming away from the project. If you drag to the right, you’re zooming toward the project, it doesn’t change. The actual length of time that each image is on the screen it just zooms in or out so now. If i click play here, you can see. I get a preview of my slideshow and notice that imovie is automatically adding a little bit of motion to these images, there’s a little bit of what they call ken burns effect or just a little bit of zooming in zooming out and in this case kind of Moving down sometimes moving to the side, so that’s really a fun effect.
That’S automatically added to your narrated slideshows! You can affect that if you would like to as well by going into some of the settings now that i’ve watched in preview form my slideshow, i may decide, i need to reorder some of the images, that’s very simple, to do, click and drag to put them In the right order, again using this slider is going to help a lot for me, at least when i’m zoomed back away from the images. It’S a lot easier for me to click and drag and put them in the right place as compared to when i’m zoomed. In like this, and i can hardly see where i’m dragging different clips to okay – let’s assume that the order that i have here for the images is perfect. This is exactly what i want as far as the order is concerned. The next thing to think about is the duration of the image. It looks like right now. Each image is on screen for exactly four seconds.

If you want to change that, you certainly can. I could click here on my first image and by putting the mouse pointer just at the far right edge of that clip the mouse pointer changes to a two-sided arrow, and now i can click and drag to lengthen out how long that image is on the screen Or i could shorten it, so you may want to take some time to get the duration of each of these pictures just right. Just the way you want it to be.

You can click and drag to the left, as well as to the right and you’re, not really changing the image at all. All you’re doing is adjusting how long it’s on the screen, but that does also affect the ken burns effect or the motion zooming in zooming out. It does affect that a little bit as well. Okay, great now, at this point i would like to add a little bit of background music. If you recall one of the files i imported was an audio clip, and i just clicked and dragged from this media window, and i dropped that audio clip exactly where i wanted it to be in my project. If i wanted to, i could start that clip 8 seconds in or 12 seconds in or whatever, but i would like it to start at the beginning.
So let me back it up and try what i have so far. If i skip ahead a bit, you can see the audio clip continues even well after my images have stopped showing up on the screen, so i’ll need to adjust the length of that audio clip quite a bit. I could do that by shortening it from the right side by clicking and dragging here and pulling it shorter.
There are other ways to edit as well, but i’m just going to do that i’ll, just click and drag from the right and make it so that it matches the duration of the images on the screen. Now, when i did that, you may have noticed that my clip no longer fades out at the end. Let me demonstrate that quickly.
If i click play here at the end, you can hear it doesn’t fade out. It just goes from full volume to zero immediately. If i want to change that, i can put my mouse here and there’s a little tiny circle, a dot, really that i can click and pull to the left in this case to make it so that that clip does fade out now.

So i’ve added a nice little fade sound to the end of that song. Okay, at this point, i’ve got a slideshow with a music background, but what if i would like to add some narration? Let’S take a look at that, i’m going to click here on my timeline at the very beginning to move the playhead there and let’s look at how easy it is to add some narration. All i have to do is look under the preview window here at the right.
There you’ll find a microphone symbol. If i click there, imovie asks me for permission to access the microphone, and you may only see that the first time or two that you use imovie this way on a particular computer. After that it should generally remember that you’ve allowed for that access to the microphone. All right now that i’ve done that i have a red play button, but before i click that button, it’s really a good idea to first click here on the record settings when you click there, you’ll see what imovie expects as the input source. So right now it’s going to be the system default microphone.
That’S not a great microphone! I have a much better one plugged in it’s called the yeti. Stereo microphone, just an excellent high quality microphone. That’S also not too expensive.
So i’ll select that next i can adjust the volume for my narration. If i would like to – and i can make some of these changes later as well. But why not get it at least close to what you’ll want in the end, by clicking and dragging and then look at this feature with this checked as i’m recording my narration, the music from my project will be muted. Let’S try it out, so i click the record button and i get a countdown.
This project is all about: bryce canyon, it’s a beautiful place to take your family, a beautiful place to visit, and you may run across lots and lots of animal life as well. Okay, i’m done so i’ll, just click the stop button and then click done and my recording is done now. I can already see that it didn’t work out exactly how i had hoped.
If you look closely at this clip that i just recorded, you can see that there are some yellow colors and some red colors toward the top of this audio clip those indicate, especially the red colors. Those indicate that my voice may have been recorded too loudly, but regardless i’m going to click and drag that project down onto my timeline, and in this case i have it below my music. It doesn’t necessarily have to be that way.
So now i can go back to the beginning of the project: click play and listen to the results. This project is all about: bryce, canyon, it’s a beautiful place to take your family, a beautiful place to visit okay. So it’s working out great.
I can hear my narration and i can also hear the background music in the project. If you decide the background music is too loud, you can just click and pull this line down, and that will make the music a little quieter and we can also try the same thing with my voice, narration and that might solve the problem of those reds and Yellows sometimes those reds and yellows can really sound terrible to the listener’s ear. So it’s a good idea to change that. Okay, i’m really happy with my project at this point, so i’ll just go up here to the top of the screen and click the share button. You can see that there are some good ways to share your narrated slideshow on social media sites, but in this case i’m just going to click file to save to my computer, i’ll change, the name from my movie 2 to bryce canyon. If i want to, i can change the resolution and also these other settings, if i would like, but i’m happy with these defaults.
I’Ll click next and it looks like imovie – is trying to save this in my movies. Folder, that’s perfect, but if i didn’t want it to save in movies, i could click here or click this button here to find a different place on my mac in which to save my narrated slideshow, i’m just going to click save to save in that default location. Okay, at this point, i’m done with the project now, even though i’m done with the project you can see, imovie is still building my narrated slideshow.
It’S compiling the audio, the pictures, everything together and when this pie is complete, it just finished. That means that my video has been successfully exported. It’S been created i’ll click, the show button that just shows you the folder in which the finished movie is saved. So here it is.
I can double click on that file to open it up, and here is my completed. Narrated slideshow, i’m just going to skip ahead a little bit and then click play to demonstrate it beautiful trees and other plant life, and so there’s my finished movie. I am super happy with how that turned out i’ll go ahead and x out of that movie and go back to imovie. So at this point the movie is done, it’s been created, but it is a good idea before i exit imovie to click this back arrow, to go back to my list of projects when i try to do that, it wants me to name and save my project. So again, i’ll call this bryce canyon click. Ok, it adds it to my list of projects, and i am completely done at this point thanks for watching.
I hope you found this tutorial to be helpful. If you did please like follow and subscribe and when you do subscribe, click the bell so you’ll be notified. When i post another video, if you’d like to support my channel, become a supporter of mine through my patreon account and you’ll, see a link to that in the description below you’ll also find links to more information about the blue yeti microphone. If you want to look into it and see if you would like to purchase one they’re, awesome, microphones, .