
Hi, this is Wayne again with a topic “Building The Ultimate ROG Gaming PC”.
I’M gon na see, if I can do this intro without using my hands, what’s happening, guys, I’m tech source and in this article we’re gon na be building an rog themed gaming pc. You know it’s been decades since I’ve done a black and red build, which was Big, Reds original color scheme for those that remember, but since Lily came out with their 11 dynamic rog edition case, I thought this would be the perfect opportunity to do a black and Red build for the CPU, we are going with the risin 730 800 X, 8 cores 16-bit processor, simply because this is the only risin 8 core processor I have at the office now, if you guys are deciding between the 3700 X and the 3200 X, make sure To buy the 3700 X instead, if you buy the 32x, you are spending around 10 percent, more for only 3 percent more performance. The price just doesn’t justify spending that extra $ 30, especially if you plan on overclocking, because that margin is gon na be a lot less than 3 %, save that $ 30 and spend it towards more storage or RGB fans or whatever it is. It’S not worth picking up at 1300 X around, we are going with only 16 gigs of the corsair dominator Platinum’s at 3200 megahertz. We can use all four sticks, since the motherboard only has 2 dimm slots, and this is what ASA sent me to use in the build the ROG crosshair 8 impact mini DTX motherboard for those of you that aren’t familiar with DPX boards. The main difference between a mini ITX and a mini DTX is the length mini. Dtx boards have the same width, but they are slightly taller allowing extra space for an expansion slot.

However, on here we have an audio card. Instead. One thing I like about this motherboard is the layout. We have both the 24 pin an 8 pin epc connector on the same side, which is going to look much better aesthetically after plugging in the cables, and we also have a sodam expansion card that supports up to two and two SSDs with two extra fan.
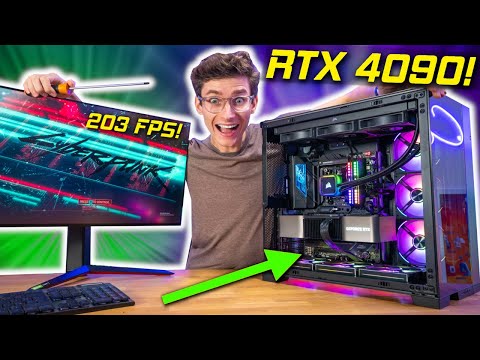
Headers and a three pin 5 volt RGB header. I also love the connectivity options in the back. We have a digital out along with the USB type-c wireless AC, and it even has a Q code reader with a clear CMOS button. Don’T underestimate its size. This is still an enthusiast level motherboard and we’re gon na use this to push the overclocking as far as we can, since we are on the x5 7 a chipset and makes sense to take advantage of Gen 4 speeds so for storage, we’re going with the fire Cuda 520, which is a one terabyte MDOT to nvme, Gen 4 SSD, and this is a high-end gaming and streaming PC. So obviously we got ta throw in an RT X, xx, atti! You guys already know how we do it over here and finally, powering everything is the cursor, a x8 50 Platinum certified fully modular power supply. So originally I was planning on using what Asus sent me. The are OD Strix LC, 360 and IO, but I got a better idea since we’re gon na be using a mini, ITX motherboard inside this massive case.

It’S gon na look a bit empty. There’S gon na be a lot of unused space and honestly this case is designed for water cooling. So when I see a lot of people out there building air-cooled systems inside a dynamic or 11 case, I can’t help but to think that they’re not really taking advantage of what the case was designed for. So that is why we’re not only throwing in the ekp 360 liquid cooling kit, we’re also gon na throw in the ek digital plate, specifically designed for this case, and since I’m not gon na be using this in the build.
I thought why not give it away to a subscriber, but that’s not the only thing. I’M giving away that, along with two of the liquid cooling kits from ek, will be given out to three random subscribers and, if you guys want to participate, make sure to stick around to the end of the video. But with that said, you guys know the drill.
We are gon na shut up cue, the music and begin the montage [ Applause, ], [ Applause ]. Let’S go Oh hold my cut, oh my god. Yeah the screen is way too big. I’M not used to the size, there’s just more mouse movement for me. Get sub this is my spot.
Oh my god sniper. What are you? Oh, my god? Oh such a horrible game and everybody I feel, like everybody, really played horribly yeah, okay, so pretty happy with the build. Overall, you know, despite using a mini ITX motherboard inside a full ATX case.
It doesn’t look that empty the EK digital plate, along with the tubing kind of filled up the empty parts of the case, and overall, it looks pretty damn awesome. I did have to paint the thumbscrews and fittings and black, unfortunately, because the chrome accents would have stood out in this build. I also found an easy way to paint them, so I basically used a few 2-inch nails and stuck them inside styrofoam, and then I use them to hold up the fittings that way. I can spray paint all around it. The ek liquid cooling kit was super easy to install and I’m really happy with the temperatures which I’ll go over later in the video. But there is one thing: that’s missing from the kit that I would love ek to include, and that is a drain valve. Without it, maintenance is going to be really difficult, since there is no available port to drain from.
I tried using a regular drain valve, but the lowest port on a digital plate was too close to the pump and it would interfere with the handle. So I used a different kind of valve this. One over here doesn’t have a handle up top making. It super convenient to fit in tight spaces, and the way it works is by rotating the valve to open or close it. With this I was able to fit it behind a digital plate and I even used the same valve in the mini red-billed, because once again, the handle from the regular drain valve would interfere with the side panel, and I couldn’t put that back on. So a lot of you guys already know that this is Linley’s new version of their dynamic case they’re, calling it the XL rog certified, and it has some really nice improvements over their non Excel version. For starters, that has more connectivity in the front. We got two additional USB 3 ports near the bottom, with the addition of a reset switch and two LED buttons that controls the front strip.
The bottom button cycles between all the static colors, while the top one gives you a bunch of cool effects to choose from and of course, you got the everyone’s favorite RGB rainbow. At one point I was debating on keeping all the lights red like how it is now, but I know it just feels a bit tacky to me personally. I think that all that red lighting drowns out the detail and aesthetics of the build.
So, that’s why I decided to just keep the CPU block Ram and the GPU and red lighting and everything else in white to kind of illuminate the build. But I don’t know, what do you guys think another nice upgrade is the hard drive cages? They are now hot swappable, so you can slide your hard drive or SSDs in and out much easier. Each cage has this very own.
Sata power and data cable, already hooked up so we need to do – is connect this to your motherboard and power supply and you’re good to go. This case is also slightly bigger, allowing you to install an extra 120 millimeter fan in the back, and you no longer need to take off the thumb screws to remove the top panel. You can just use the unlocking button. Instead, one cool thing about the case is the optional GPU sag bracket. I love how they integrated it with a motherboard standoffs. It’S nicely tucked away behind the GPU and it’s very effective with heavy cards like the Strix r-tx 2080.
Ti all right, let’s talk overclocking. I think I got pretty lucky with the silicon lottery, because I was able to push the 3800 x2 4.4 gigahertz on all cores on just 1.3 volts and for the 28 ETI I was able to add an extra one. 30 megahertz on the core clock and 1225 megahertz on the memory looking at temperatures, the 3800 X idles as low as 36 degrees, with some spikes up to 45, while the GPU consistently stayed at 31 degrees, while gaming, the 1300 X stayed under 57 degrees Celsius. Most at a time while the GPU peaked at 69 degrees a couple times overall, the temps are low and I’m really happy with the performance of the PC, and I like to think that the fan configuration in combination with the improved airflow of the case contributed a Lot I decided to max out the fan slots in the case, and I went with three intake fans on the bottom to make sure that the GPU and the rest of the components are getting enough. Fresh cool air, while having four fans up top to exhaust the hot air out. I also had so much fun gaming on the viewsonic elite, which is one of the first gaming monitors with a 1440p resolution and a 165 Hertz refresh rate with a 1 millisecond response time on an IPS display.
I will be doing a full review on this, so make sure you guys are subscribed if you don’t want to miss out overall, I’m really happy with the case design, and this was personally one of the easiest builds I’ve done recently, because this case has so much Support for expandability and cable management, so yeah well done Lindley and Asus, and I pretty much does it for this video. I hope you guys enjoyed it. Like I mentioned in the beginning, I will be giving away two liquid cooling kits from ek, as well as an Asus LC 360, a IO, if you guys want to enter all you have to do, is leave your feedback regarding the build or lynly’s new rog accel. Certified case in the comment section below as well as pick one of these to take home.
One of these by the way is a 240 ml rad and the bottom one is at least 60 ml rads. So please pick one that fits your case. Allows the winners on weekend on my Twitter or Instagram account. So follow me there. If you guys want to know who won you don’t have to leave a like, but it is appreciated. If you do.
Thank you guys. So much for watching I’ll leave a link to everything talked about below, and I will see you guys in the next article peace .