
Hi, this is Wayne again with a topic “Add Borders and Draw Borders in Excel”.
In this article, i want to show you how to add borders in microsoft excel, including how to draw borders, and there really are some great features when it comes to borders. Let’S take a look so here i have a spreadsheet from a small business that sells different kinds of music and let’s say i want to highlight the amount of sales from each of these four music genres. I’D like to add a border to help point out this information, so there’s a few different ways to do this. I could simply click and drag to highlight the area that i’d like to add borders to, and then i could go here to the home tab in the font group.
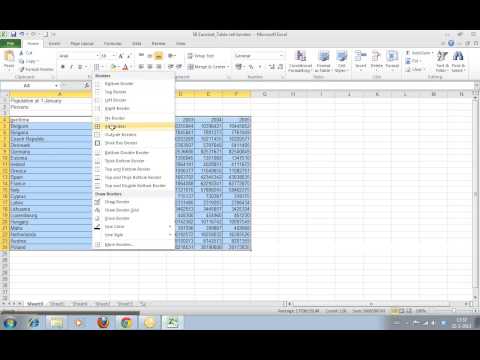
Here is the border button and there’s a drop down arrow. That lets me select from different common options. One of the most common is to select all borders. Now that i’ve done that, if i click away, you can see what it’s done all of the borders within the range that i had selected are now darker. So that was pretty simple. If i want to, i can select the same range again and go back to the borders button just to the right of the main button, and i could try some of these other options: how about thick outside borders.

When i select that you can see the effect that i get the outside border is thicker more bold than the other borders. In addition to these great features that we have, these are some of the most commonly used border patterns. We do have an option down here toward the bottom and you may need to scroll down all the way down where it says more borders.
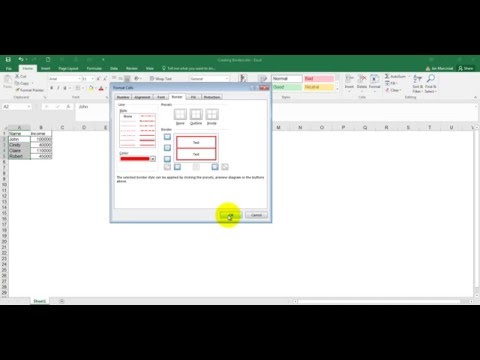
If you click that it gives you a pop-up box that you can use to select just about every aspect of the borders. For the selected area, so i could choose a different line style, maybe a dashed line or a dotted line. I could even play with the colors a little bit. If i would like here in the presets area, i could indicate that i only want these changes that i’m going to make to be applied to the outline of the range, not every border, but just the outline you can see what it did. This gives me a preview of what it’s going to look like, based on the selections i’m making. If i click none, it removes the selections that i had, or i could just say.
I want the inside borders to have these border styles these buttons here. Allow me to add in a top border, a middle border. If i want a bottom border, you can put diagonal lines as well through the cells. If you want, we have a left border, there’s the center vertical border and the right border, and there we have another diagonal line. So using this pop-up box, we can customize the borders exactly how we want them to be in our spreadsheet. For this example, i want to go with the color of dark blue and this style here.
I’Ll click, ok and my range now has the borders that i set up now. There is another way to add borders and it’s a lot of fun. It’S called draw borders without selecting anything specific. All i have to do is go up here to this more borders, button and click, and then i can go down here to draw border, and now i can simply click and drag to draw a border onto my spreadsheet, and i can extend that anywhere.
I want. I can put a border here if i want one there, i can be as specific and detailed as i want with these borders now. What? If you have a lot of cells in a range like i do here and you don’t want to have to specifically draw every border edge with the mouse and by the way, you can simply click instead of clicking and dragging. But if you don’t want to have to do that, what you can do is go up here and click on this button and select draw border grid.
So at this point, when i click and drag, i’m selecting a grid and everything within that grid or range that i select will have the border. So that’s a faster way in many cases to do what i want to do now. You’Ll notice that these borders, that i added later don’t have the same style or look as the rest of my borders.
If i want to change that, i can go here, go down to the line, color option and select a different line color. I can also select a different line style and now, when i click and drag the border style looks the same now, it’s important that you also know about this option erase border. This is a great option in many cases.
You’Ll need to do this in order to make the data and the borders look the way you want them to look when you’re done using the erase borders button just tap escape on the keyboard and now you’re back to your regular mouse pointer. That also works. When you are drawing borders, if you want to get out of the drawing borders, option, just tap escape and you’re back now. What if you end up regretting some of the borders that you’ve put in, and you don’t want to have to erase them one by one? You can select a range and go up here to this button and then just choose no border and it takes off all of the borders that are selected, and now i can use erase border to get rid of these last two.
So i hope that you have success using borders in your excel spreadsheets thanks for watching. I hope you found this tutorial to be helpful. If you did please like follow and subscribe, and when you do click the bell so you’ll be notified. When i post another video, if you’d like to support my channel, consider clicking the thanks button below the video or you can support me through my patreon account or by buying channel merch and you’ll, see information about those options in the description below the video .