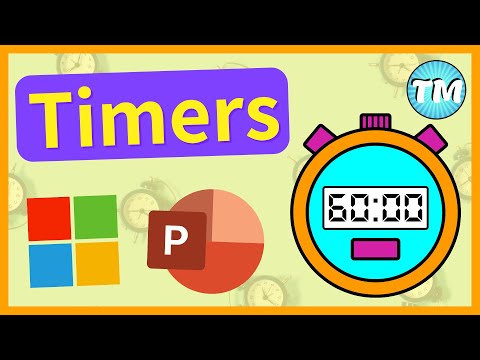
Hi, this is Wayne again with a topic “Add a Timer to PowerPoint Slides”.
In this article tutorial, I’m gon na show you how to add a timer to your PowerPoint slides and when I say a timer, I’m not talking about a timer that tells you how long your presentation has been going. That already is automatically available. If you have your computer connected to a projector on the screen, the students or the audience would see or slides, and on your screen on your computer, you would have a timer that you can look at to tell you how long you’ve been talking. So that’s something else, but in this presentation we’re looking specifically at how I could add a little timer on the screen that counts down or if you want you can make one that counts up. However, you want to do that and the sample PowerPoint that I’m using for this is one on eclipses, and I use this same presentation in a previous video that I did about how to add videos to your PowerPoint slides. If you haven’t watched that you really should do that, as well as my beginner’s guide to Microsoft PowerPoint, but as you can see, I’ve got my title slide.

I’Ve got a video that will play when the presentation is shown. I have a second video and then I’ve got a definition of solar eclipse, lunar eclipse, and then I have a slide that gets the students into an activity where they experience space using the viewmaster. These are similar to the view masters that many of us used as kids, except these are virtual reality, view masters, and they have these packs that bring to life kind of in 3d, a virtual experience anyway, if you’re interested, you can learn more about these products.
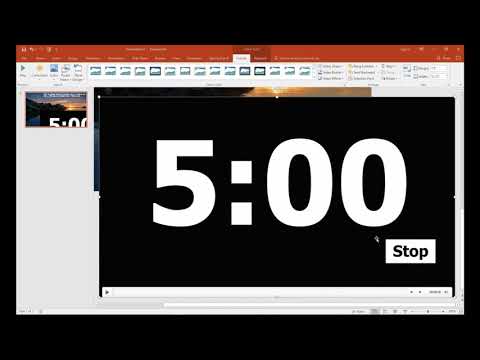
In the description below, but on my last two slides, I would like to ask the students some questions about solar, eclipses and maybe lunar eclipses, and I want to give the students only a few seconds to discuss in their small groups what the answer is and then They write down or call out their answers, so how would I do this? Well, the trick for creating your own timer on a PowerPoint slide is that you need to use text boxes and animations. So let’s look at how to do that. First, I would start by inserting a text box, so I just click on text box and I’ll click and drag to draw a text box on the screen. Next, I’m just going to type the number that I want to start how about number one.

At this point, I want to make that number one bigger, so I’m gon na highlight it. I get this little pop-up that helps me to format the number and, if you don’t get that you can just go over here to home and you’ll get those same options. But anyway, i’m gon na click to highlight it and i’ll change the size to something. Much bigger, maybe 54, maybe 72 or anything in between, in fact, I’m gon na go all the way up to 96. On that so there’s my number one. I think I would like to simper that number. So I clicked the center button and I would like to change the background color, so I’m gon na go up here to shape fill. This is on the format tab that only appeared when I selected my number in this case so here in the format tab. I’M gon na go to shape, fill and I’m gon na pick. Let’S say this: purplish blue, I guess that’s purple. I click that to make the number a little bit easier to read with that dark background, I’m gon na highlight the number again and change the color. Okay, I think that looks really pretty nice now, this other text box with Sun Moon Earth, etc.
It’S kind of getting in the way, so I’m gon na click and drag and just scoot it over – that’s not necessary, but I think doing so really makes it easier to create the timer. It just gets things out of the way. Okay, so here is the beginning of my timer. Now, what I’m gon na do is I’m gon na put that to one side here and I’ll right-click on it and choose copy and then I’ll right click paste and you can see there’s a couple of different options for paste, but I’m just gon na do this.
First, one: okay great so now I have two of them and I’m gon na highlight and change this one to be two and then I’ll, right, click and paste again. Sometimes I have to click away in order to be able to click and move the object. So you’ll probably experience that too, if you’re in editing mode with a flashing cursor, it’s gon na be hard to move. Sometimes it works, but you might want to click away and then click back to move the object. So there is number three give me a minute to add numbers four and five and then I’ll resume the video okay. This is looking great. So if you remember, I said the first key is using text boxes and that’s what we’ve been doing. I’Ve created a text box and then copied it four times and now I’m ready for the second key to creating timers, and that is animations.
So I click here on animations and I’m gon na go down to number five and I’ll click on number five I’ll go up here to the animations tab and ribbon, and click here on add animation. Now, when I do that, it gives me a bunch of different options, entrance animations emphasis, exit and much more well, I’m gon na go to exit and I’ll choose disappear. Now you could experiment with these and try some others, but I find disappeared to be perfect for what we’re trying to do so. I just clicked disappear. I need to do the same thing with all of these other numbers, so I’ll go and pick disappear for number. Four disappear for number three number: two and one now that I’ve done that we’re ready for the final couple of steps. Again, I’m going to click on number five and up here in the animations ribbon on the right side in the timing group. Let’S take a look at the settings here, notice that it says on click.
This animation will happen and I like that, that’s exactly right. Next, the duration. I want this first animation to be very fast, so how about point zero one seconds and the delay? Let’S give it a one-second delay now you can type those numbers in or you can use these arrows and just click these little buttons. So with that set I’m gon na click on number four and for number four, I don’t want it to be on click. I want it to start after previous. I want the duration to be automatic and I want the delay to be one.
Second, let’s try that with number three as well. I want it to start after previous automatic and a one-second delay and same with two and one after previous one-second delay. Okay, now to see if this is probably gon na work, what I want to do is go up here to the animations ribbon. The advanced animations group and click on animation pane when you do that you get this pane.
That appears on the right and just at a glance. I see that this is probably going to work, so textbox number 5 is going to be animated first and the animation is disappear, so that’ll disappear and then four and then three and then two and then one so, let’s test this out for real and see if It works I’m gon na go down here to this shortcut button here that says slideshow I’ll, just click and it starts my presentation on the slide that I’m working on now. If you remember the first animation, the first disappearing number, it was set to start on click.
So I have to click on the screen somewhere or you can use the arrow key or the spacebar or if you have a presenter, remote just advance the presentation, but I’ll just go ahead and click and five four three two one very nice now, even though I Like that, I think it makes more sense to have the numbers kind of overlapping each other kind of stacked on top of each other, and let’s try that out. So I’m gon na put one here, I’m gon na click away and then click on two and make it overlap. If I can and you’ll notice these little tiny guidelines helping to guide me to getting this just right, if you haven’t noticed those guidelines, look at the corners and the edges of the text boxes as I move them number four.
I think I got that right and number five great. Let’S take a look at how it works now that I’ve got them overlapping. So I start the presentation: what is the correct alignment during a solar eclipse student? What do you think you have five seconds to discuss and write your answer, so I clicked five four three, two one time’s up. Alright, I’m happy with how that worked.
Now, of course, you could add much more than just five numbers. You could go up to ten. Twenty, whatever you want to do, it is a little bit of work to add a lot of numbers, but if that’s what you want and what you need in your presentation, you can go ahead and do that also, you might want to think about adding a number Zero or some sort of message, maybe a text box that says times up or something like that, but you could certainly do that thanks for watching this tutorial. I hope that you found the video to be helpful.
If you did, please click the like button below and consider connecting with me on my social media websites like Facebook, Pinterest and Twitter, and definitely do subscribe to my youtube channel for more videos about technology for teachers and students and watch for another video. From me. At least every Monday, if you’d like to support my youtube channel, please consider becoming a patron of mine through patreon, and I have a link in the description below that will take you to my patreon account. .