
Hi, this is Wayne again with a topic “Cool Tech for your Setup Under $50 – Episode 7”.
If you guys are looking to spice up your setup but are on a tight budget, you came to the right place. We’Re gon na check out some cool tech for your setup under 50 bucks. Let’S begin what, if you can control your PC from anywhere in the world? Wouldn’T it be cool to always have access to anything? You need 24 7. Wherever you are well pulseway who’s sponsoring.
Today’S video has you covered pulse way is an all-in-one. It monitoring and management platform built for it professionals and enthusiasts to make their life much easier setup process takes only a few minutes to get you up and running whether you’re grocery shopping, running errands or on a vacation pulse way. Has you covered with a fully functioning mobile app to keep all your systems at your fingertips? You can view your PC’s usage temperatures, access, storage, printers and even run commands and stop applications all from the app.
If you left your home or office and forgot to shut off your PC, you can do that too. You have access to a full list of commands to control your PC from Simply logging off to shutting it completely down, get instant notifications of any issues and resolve them immediately immediately without skipping a beat and the best part about pulse way. It’S completely free to try out with no credit card needed, simply start a trial using my link down below and experience it power within a few minutes kicking out the episode. Are these really cool light bars? That will surely add some spice to your setup because who doesn’t like RGB, I’m sure we are all familiar with the Gobi Light Bars by now.
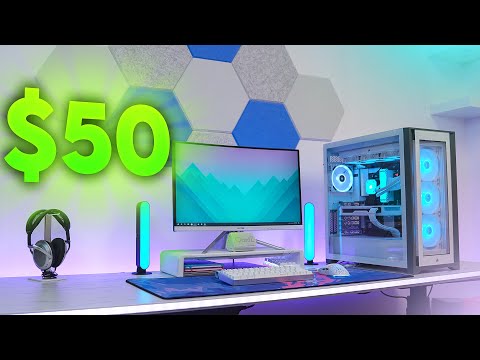
Well, these are basically the same thing, but at half the cost. Also, the biggest difference between these and the Gobi Glide bars is that these are USB powered, which is way more convenient. This means you can plug them directly into your PC or any USB power source. Instead of having to plug them directly into your wall, or in my case plug them directly into the back of your monitor’s USB port, that way, you don’t have to use up a USB port from your PC. This also gives you more flexibility on where you can mount them, because all you need is a 5 volt USB port. Because of this I was able to mount one light bar behind each of my vertical monitors. To give my setup some nice ambient lighting, you get two light bars with a split USB PC cable that is needed to combine both lights together and the USB 3 tip plugs into any 5 volt USB port. You also get two stands and four magnets, giving you the option of mounting them to any surface you want.
The stands are pretty straightforward. You can either have the light bar standing vertically or horizontally, and you can position them. However, you, like some people like to keep the light bars in plain sight facing them towards the front, while the others like to keep them hidden and position the light bars against a wall to have the lights bounce off for ambient lighting. Whatever you decide, you have the option of using the included stands or by mounting them to a surface. Using these magnets, you get a total of four magnets two for each light bar. You have to use these double-sided adhesive strips and stick them to one side of the magnets, and then you can attach both magnets onto the labeled area on the light bars.

After that, you can decide where you want to mount the light bar, preferably an even surface, to ensure the adhesive strips thick. You can hook them up on the side, baby monitors underneath your motor or keep them hidden behind your Martyrs. There are buttons in the back of one of the light bars that allows you to manually change the colors, but I strongly recommend using the App instead as it’s a lot easier to control the lights, you also have access to way more lighting effects on the first Tab, you can choose from Seven static colors with brightness control. The second tab gives you access to a bunch of pretty cool effects, with the option of customizing your own colors, along with the speed and brightness. The third tab is a music feature. The lights will react to the sound and you can choose from four different effects along with sensitivity and, finally, on the fourth tab, you can set a timer where the lights will shut off after a specific amount of time.

I like how the lights are perfectly diffused and they are surprisingly very bright, just not as bright compared to the Govi light bars of course, but they are bright enough to a point where they will illuminate any area you put them in. So if you’ve always wanted to add some light bars to your setup, but don’t want to spend over 50 dollars, I highly recommend picking these up up. Next is a very handy piece of tag for every setup.
This is the huian mini key dial and it’s basically a wireless numpad and an Elgato stream deck combined into one device. You can customize up to 18 buttons and a dial using the key dial software. They made it very easy to sign certain keys or set specific macros, but you can do so much more than that.
You can launch certain programs or games and even control certain system applications like locking your computer screen, putting your PC to sleep or even powering off your entire system. It really is just a cheaper alternative to the Elgato stream deck just in a numpad format, but the biggest difference here is that it does not have any LCD displays for each button, obviously, because of the price being so low. You’Re, just gon na have to remember what each button does which isn’t too bad, especially since you can set a quick cheat sheet as one of the buttons. So this is how I configured my wireless pad.
Most of the buttons are numbers that you would find on a regular numpad and that’s because I use numbers a lot when I’m paying my contractors every month and also when I’m working with average FPS numbers during gaming benchmarks. I love my custom keyboard to death, but not having a numpad really hurts my productivity. The rest of the buttons are just shortcuts to the apps I use the most. I got a shortcut to Modern Warfare 2 and one more for Vegas Pro, which is my editing.
Software, so the knob function is actually really cool. It’S currently set to my volume control, but if I press the middle button, I can switch between three profiles profile. One is my default, which I just talked about. Is my volume control.
I can adjust the volume of windows by simply rotating it clockwise or counterclockwise profile 2 is my previous and Skip controls for my media player, so rotating it clockwise is Skip and counterclockwise is previous and profile. Number three is my least used profile. It basically allows me to scroll up and down, but I don’t really use this because I have my mouse scroll wheel. The software makes it extremely easy to customize, and you have the option of setting increments for the dial sensitivity from one to five, as well as put a sleep timer, where it will turn off after a certain amount of time. The wireless micro pad is rechargeable with a 1200 milliamp hour battery and it’s stated to last about 100 hours of use, which is pretty impressive, but here’s the cool part about all of this. You can have multiple profiles for each specific program that you use on the top.
Here. You can add specific programs to use with the key dial. So, for example, I have it currently set to all programs, meaning that all these shortcuts will work everywhere. But let’s say I want a completely different set of macros and shortcuts when I’m using my editing program, I just simply click on it and add a program to the list. Now I can completely customize the pad and add shortcuts or macros that’ll, be very useful. For me, while I’m using the editing software, you can add as many programs as you want and switch between them as many times as you want.
This is such a cool and useful thing to have in your setup. I strongly recommend this to anyone. Looking for a wireless numpad or a macro pad, this next item is pretty simple and straightforward: it’s a magnetic headphone hanger, but what I love most about this is that it’s not permanent, like a traditional hanger that has an adhesive strip in the back when you eventually Peel, those off it usually ends up leaving residue or it damages the surface. Since this is magnetic, you can detach it. Whenever you want without worrying about damaging anything in the process, it does fold making it easier to carry around. But, more importantly, it’s a simple design that just works.
You can attach this to any magnetic surface, to hang your headphones, but it’s mostly designed to stick on the side of your PC case, which will keep your headphones hidden from Plain View when you’re not using them. Okay, these are actually really useful, not just for your setup but everywhere else in your home. These are Wireless motion, sensor lights that you can install anywhere in your home where light is not available, for example, let’s say you’re at your setup and you need to access the back of your PC to plug in a device or check something out, but it’s dark In your room – and you don’t have a light source underneath your desk well with the motion sensor, light installed, all you have to do is wave something in front of it to turn the lights on. But if your legs constantly trip the sensor, you can manually turn it on using the switch on the side, either way it’s a very easy way to add a light source in the places where you need it.
Another great example is in your closet or a room where there isn’t any light. For example, let’s say you have a pantry that doesn’t have a light source which apparently is very common in the US. Adding a light sensor is extremely useful. It will automatically light up the room as soon as you walk in it will detect motion within 10 feet and up to 120 degree range. It will also automatically shut off after 20 seconds of no movement. Each of these lights have a 1 000 milliamp hour battery and on a full charge. It can last up to four weeks. If it’s used 10 times a day, it does have a usb-c port on the top, which supports fast charging, and it will take three hours to charge from zero to a hundred percent. Those are just two examples of where you can use these around the house, but you get the idea. The fact that they are very thin and light allows you to put them virtually anywhere.
You need a light source. These are attached magnetically by default. So if you have a magnetic surface, then you’re good to go. But if you don’t that’s cool, you just need to use the included magnetic strip with the adhesive.
Just stick this anywhere. You want and then attach the light sensors to it. If you need quick access to light and dark areas in your home or your setup, I recommend picking these up. Last but not least, we are checking out some very cool keycaps that just got released by cable mods.
The company, who makes high quality custom cables. You’Ve. Definitely seen them in my PC build on the channel. Well, now they’re doing keycaps and they have four new keycap sets and three modifier sets.
The keycaps are all lasered ABS, with UV coating and they’re, designed with carefully placed Legends and sub Legends for maximum brightness. These do look so much better than standard keycaps. Here’S my 60 keyboard from Corsair, with the stock, keycaps and – and here are the new cable mod keycaps. The lighting is noticeably brighter as there is more lighting being led through to each keycap.
Each kit has a special setup novelty keycaps that adds a unique look to your keyboard. My favorite is the berserk set because of the cool font that they used and the ax space bar, but I know the weaves would really like the Japan set the most, even if they don’t speak it. It’S just a nice way to show your obsession for the Japanese culture, but if you want to take your keyboard a step even further, you could add these modifier kits. There are currently three different sets.
We got Berserker, Egypt, Japan, they essentially replace the original Legend on the keycap, with an image and when the entire keycap set is installed. You get this beautiful, seamless, design that transitions from one side of the keyboard to the other. These keycaps support all sizes of keyboards. From 100 to tkl and even 60., the modifier sets offer ANSI support, while the full keycap sets support both ANSI and ISO layouts. If you’re looking to spice up your boring keyboard, I highly recommend checking out these keycaps.
All the cool Tech I talked about will be linked Down Below in the description section if you guys are enjoying the Cool Tech series on the channel. Do let me know by tossing a like thank you so much for watching subscribe for more cool Tech. Coming your way and I’ll see you guys very soon on the next one, .