Hi, this is Wayne again with a topic “Mirroring iPad to Computer vs Connecting to a Projector”.
In this article tutorial, I’m gon na try to answer the question. How do I get my iPad to project onto the screen through the projector or a question? That’S even more commonly asked of me. How do I get my iPad to show up on my computer screen? So that I can record it, many of you have seen my tutorials on iPad apps and I’ve gotten lots of questions about. How do I show those apps that are on my iPad and yet show them on my computer so that I can do the video tutorials? So, let’s start with the first question: how do I connect to a projector if all I need to do is show my iPad to students or to an audience through a projector, and the answer that Apple would like you to use is one of two things they Would like you to either buy this cable? This is the Apple lightning to VGA adapter, and this is for the newer iPads that have the Lightning connection on one end and then on the other end, you have a VGA on the Left, VGA connection and then on the right.
You’Ve got a place where you could plug in a charger, cable and supposedly it will charge your iPad while you’re displaying it through the projector. You don’t really have to use that part at the right. You can just hook up to the VGA at the left and it works now. This is a good option. There are a couple of downsides to using this cable, the main one being the price. It’S fairly expensive, also notice that it is a very short cable.

I mean this is a just a couple of inches in length, this part of the cable, and so those could be serious problems for you. Also, the cable tends to disconnect from the VGA cable unless you can really get the cable screwed in properly now, if it doesn’t unplug it this end, sometimes it does unplug at this end. Also, if you have an older iPad, make sure you get the older adapter, which is also available online and I’m showing this on amazon.com, but there’s lots of other places where you could buy this cable now. The other downside to using a cable like this is that you’re tethered, let’s say, you’re a presenter, a teacher or you need to do a business presentation, you’re going to be tethered to the projector. If you use this option also, what if you want to record you iPad screen? This doesn’t really help you that much. So, let’s look at some other alternatives. One of the more popular alternatives is Apple’s own Apple TV. You can buy this Apple TV and connect it to your VGA cable that goes to your projector or to a TV, and then you can wirelessly connect to this through your iPad, and you would do that by using the airplay functionality. Basically, you swipe up from the bottom center of the iPad and there will be an option to airplay to the Apple TV.

Now you’ll see what that looks like in just a few minutes here when I show an alternative, so you can see Apple TVs. The price has dropped quite a bit, it used to be hundred dollars or more, and now it’s it’s under a hundred dollars. I don’t know if this is the most recent version of Apple TV and it does include some other bundled items it looks like so this is what Apple wants you to buy, if not, that cable that I showed earlier, but there are some cheaper options available if You’Re willing to try some out one that is very popular and that I’ve used quite a bit is reflector, and this is by a company with kind of a strange name.
Squirrels and the website is air squirrels calm. Now I have reflector version one, but this is reflector two now that you can buy from the website and you’ll see that the price is a lot better than some of the other options. If you go down here to reflector 2 and click, buy you’ll, see that for a single computer license, it’s only $ 15 to get reflector 2. Now, there’s always a little bit of confusion about this. People assume that reflector is an app for the iPad. It’S actually not. This is an application that is installed on your computer and it is for Windows or Mac.
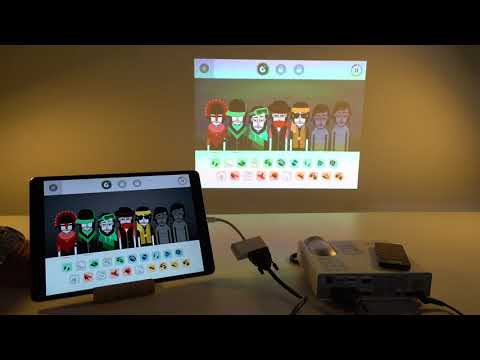
Both there’s either option. You can also buy it in bulk licenses. You can see down here and get better deals, but $ 15 per computer is a great deal once you install reflector on your computer, let’s say it’s time to show your iPad on the screen to an audience, or maybe you want to record your iPad screen all You have to do is go to the spotlight search on a Mac computer on a Windows computer. You could just do a window search, but I’ll just go in and I’ll type in reflector hit enter. Reflector starts up, and it seems nothing happened here in the upper left, though it does say reflector, and this will look a little different on a Windows computer if you try out, but that just tells me that reflector is ready to work. So now, let’s look at how to connect to reflector on my iPad. All I have to do is touch in the bottom center of the iPad home screen and drag up and at the bottom of the screen there. Where you see air-dropped, if things were set up properly, you would see airdrop would scoot to the left and on the right side it would say airplay and I would just tap that and it would pop up with a list of Apple TVs and other airplay options That I could connect to now. Let’S say I don’t have an Apple TV. I would just look for the name of my computer.
So remember I installed reflector on my computer and I opened it up on my computer and then I turned on my iPad swiped up from the bottom Center, and so the way you connect the two is you tap just to the right of where it says there Drop, it will say: airplay you tap on it, it pops open – and you select your computer from the list then once you do that there will be an option to turn on mirroring and you need to do that now. There are a couple of downsides to this. A couple things to watch out for number one is that both devices, your iPad and the computer, that you’re sending the iPad screen to that you’re mirroring to they both have to be on the same Wi-Fi, the same wireless network and there’s such a thing as networks And sub networks, and sometimes they’re both on the same network but different subnets and you know sometimes it just doesn’t work. It really depends on your school’s internet settings and your school’s network settings, and I, when I’m out of the schools, I never know for sure.
If this is gon na work or not because every school every school district has their network settings set up a little bit differently, but when it works, it’s awesome. It’S great and the two devices get connected and anything that I do on the iPad gets reflected onto the computer. You can also go fullscreen and you can do some screen recordings as well. So there’s a lot to like about reflector but, like I said I never know for sure if it’s gon na work at any given school, a second option is called airserver, and these are really the two big names in this idea of wireless mirroring, just like reflector From air squirrels you’ll need to be on the same network and you need to have Wi-Fi capability. Not all computers, and especially desktop computers, have a wireless network card, and so that’s one of the obstacles to both reflector and airserver. But this is an alternative, and really these are the two heavyweights in this category of software, that mirrors from the iPad.
I don’t have any personal experience with airserver a lot of people like it, though, and then there’s a newer option. At least new to me called mirroring 360 by the famous app company Splashtop and supposedly this is even more compatible than these other two options. So at your school, if someone has tried reflector or tried airserver and it hasn’t worked, I would try the other one and then you you also might try mirroring 360 again. I have no experience with this, but I’ve heard that it might be a little more compatible than these other two now.
Sometimes none of these options work, for example, where I am now reflector just isn’t working with the network settings and, like I said before that happens to me from time to time when I’m out at a school, and so at that point I either have to just Tap in directly to the projector using the expensive cable that I showed first, but there is another option and very few people know about it, but it’s a really great option and that option is to use the lightning cable. That came with the iPad that you have or an iPhone. You can simply use this to plug in your iPad to your laptop or desktop computer and then pull it in now. If that’s the case, why don’t people know about this? Why don’t they use this cheap cable that came with the iPad? Why do they go ahead and buy the expensive cables? Well, it’s it’s not a well-known option until now.
Hopefully, so I’m just gon na demonstrate how to do this. Here’S my iPad and I’m just gon na plug in the lightning cable and, on the other end, the USB cable just goes where you would expect into the side of the computer and now on the computer. All I have to do is go to the spotlight in the upper right corner and notice that I am on a Mac. I am not certain if this works on a Windows computer, but it definitely works on Macs and here in the spotlight search.
I’M just gon na do a search for QuickTime Player. Now many of you, I’m sure, are familiar with QuickTime, and you know that this really isn’t what QuickTime Player is about, at least that’s not what it’s famous for, but at least on a Mac look what you can do when you fire up QuickTime Player. You get this pop-up, it seems to want you to open something. I’M just gon na click done to close it sometimes you’ll get other pop-ups as well. You can just close out of all of them and then go here in the upper left corner. You can see, QuickTime Player is activated, I’m just gon na go to file new movie recording. Now it’s easy to get confused about this. Many people go down and choose new screen recording, but that would record your computer screen. We want to record the iPad screen, so I’m gon na go here to new movie, recording, select that and you get a pop-up and typically it’ll open up your webcam. But you can see down here toward the bottom.
There’S the record button and just to the right of the record button, there’s a down arrow and you click on that down arrow. You can switch it to your iPad. At least you should be able to and notice that this says camera iPad air underneath there’s also an option for microphone. Ipad, air and I’ve had mixed luck with that, but with the camera it seems to work fine.
So I’m gon na click on that and now it switches from webcam to iPad. So if I wanted to, I could just click on the record button and do a screen recording right there using the QuickTime Player. Usually, when I show my iPad this way, I like to go up to the top of the screen, click view enter full screen and you get a nice look there on your iPad. Now, one of the nice things about doing it.
This way is, the connection is solid. You never really lose it. It doesn’t rely on Wi-Fi, it’s just a very reliable way of connecting your iPad to a computer. So thanks for watching – and I hope that one of these options at least is going to be helpful to you and you be able to use it to show your iPad to an audience or maybe to make your own video tutorials kind of like this one. Thanks for watching – and please remember, to subscribe to this YouTube channel to find out more about technology for teachers and students, .