
Hi, this is Wayne again with a topic “How to Take a Screenshot on a Mac”.
In this short, video tutorial, we’re gon na actually answer a question that I get all the time, and that is how do I take a screenshot on a Mac, and this should work on just about any Mac. Any Mac that’s running OS 10, whether it be a laptop desktop, whether it be a MacBook Air. It really doesn’t matter. This should work on all of them.
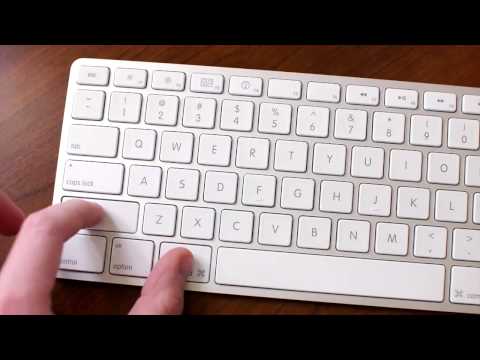
So let’s say I’m a teacher and I’m having my students go to this website to play educational games, but I want them to be able to prove what their final score was, what their best score was well, they could take a screenshot of it and on a Mac, it’s so easy. All they have to do is hold the command key on the keyboard and then hold the shift key on the keyboard and then tap the number three. Now, when I did that you heard a sound okay, a camera shutter sound, and that represents my Mac, taking a photo taking a picture of what you see on the screen and it takes a picture of everything everything that’s visible here. It took a picture of now. Where did that picture go well to see where it went? You have to move aside the browser, so there are the two screenshots that I took. Okay, I can double click to open them up, and that is an image. It’S a PNG, okay, here’s another one and I can right-click on it and choose get info so that you can see exactly what it is.
It’S a PNG and it’s a screenshot okay great. So that is one good way of taking a screenshot, and in this case it’s really ideal. I mean that worked great, but sometimes there’s a better way as another example. I’M gon na pull up the Wall Street Journal and you can see that there’s some articles on here and let’s say I or one of my students – wants to capture an image of one of these articles or something from the website to share a snippet of it. Now, first of all, of course, you would still want to give credit cite your source and all of that, but using the Mac keyboard shortcuts, you can take a snippet or a snapshot of this website, so I could do command shift 3 and get everything that you See here on the screen, or I could do command shift 4, and that gives me this plus sign.
These are crosshairs basically, and you just click and drag around what you want to capture and then let go. It takes a snapshot of it and just like before it puts it on your desktop, so here’s the snapshot now from time to time. You might want to take a snapshot of a menu item which can be kind of tricky right. How do I take a snapshot of this menu because won’t it just disappear when I move my mouse away from it or what not? Actually, no, it should work. Fine, if you do command shift for look it kind of freezes in place, and you can highlight it and you can take a picture of it great one last thing you need to know about taking screenshots on a Mac computer.
Is that there’s a little shortcut for when you might have more than one app? That’S open? Okay! So at this point right here I have two apps, two programs that are open to Windows really and if I do command shift 4, I get the crosshairs just like before, but watch what happens if I press spacebar now it gives me a camera button and what This means is that whatever window, I position this camera on when I click the left mouse button, it’s gon na take a picture just of that window. So I’ll do that here I get the sound and now, if I look over on the right side there it is, it took a perfect screenshot just of my Safari window, and so what that does is it saves me, the hassle of getting the crosshairs all perfect And clicking and dragging and get the perfect spot now in any of these cases of using the crosshairs or the camera. If you ever change your mind and say: oh actually, I don’t want this. I want to start over start fresh.
All you have to do is tap escape on the keyboard and it takes you back out and then you would have to do command shift 4 to start the process over again great. So now, with these screenshots on my desktop, I can use these in PowerPoint in keynote in word, Pages Excel. Whatever tool I want to use these in, I can use them and again it’s important to cite our sources and teach our students to do as well. So thanks for watching these two keyboard shortcuts and a couple of different tips and tricks are pretty simple, but I think you’ll find them to be extremely useful and for me, great uses for these come up just about every day.
So thanks for watching and please consider, subscribing to my youtube channel for more videos about technology for teachers and students and look for a new video, at least every Monday. .