Hi, this is Wayne again with a topic “Adding and Deleting Columns and Rows in Excel”.
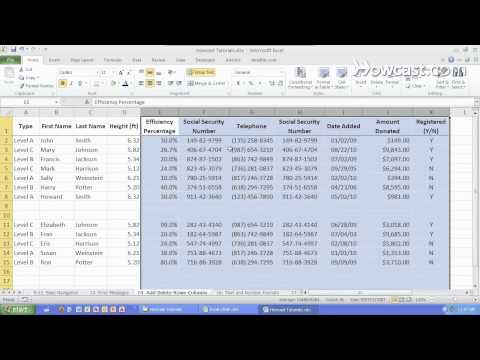
In this article, i’m going to show you how to add and delete columns and rows in microsoft, excel we’re going to look at the basics and a few tips and tricks to help you do this more effectively many times when you’re working in excel and you’ve entered Some data from time to time you need to add a column, maybe not at the far right of your data but somewhere inside your data same with rows. How do you do that? So, first, let’s look at the most common method that many people use, and that is to right click. If i want to add a column here between c and d, all i need to do is right. Click on d and choose insert and a new column will be added before column d. There it is, and now i can – click in d1 and type in the column heading rows work the same way. I can right click here on row, 10, on the actual number. Click insert and a new row is added before the current row that i had selected now. In this case, i needed not only one row but four. Why? Because this spreadsheet is tracking four quarters of the year for each of these album names and bands. So if i’m trying to add the depeche mode album some great reward to the spreadsheet, i need it four times. The good news is, i don’t have to right click on 11 and choose insert and then do it again and then do it again.

Instead, all i need to do is click and drag from, in this case, row 13 to row 11, making sure that i’m staying on the row numbers and then i can right click on any of those row numbers and choose insert because i selected three row numbers When i click insert three blank rows are inserted before whatever i had selected so now, i have the three additional rows that i need now that works also for columns. So if i need three more columns in front of column e, i can just click and drag on e f g right click on any one of those and choose insert and three columns are added. Before the columns i had selected i’m going to undo that with ctrl z, if you’re not exactly sure how many columns or rows you need to add, you could just use the first method i showed just right, click choose insert and then you can just tap the F4 key and each time you tap it you’ll get a new column in this case, f4 is just repeating my last action. It works the same way with rows. So if i right click insert one row, but maybe i wish i had inserted two three or four: i could just tap the f4 key. I get another row, maybe i tap it a few more times get a few more rows.

So those are a couple of different ways to add more than one row or column at a time you can use the click and drag to select multiple rows method or columns and then just right click to insert that exact number or, if you’re not exactly sure. Just insert one or two blank rows or columns and then tap the f4 key a few times as needed. Now what about deleting columns or rows? I obviously don’t need all of these columns. I’Ve added! So i’m going to click and drag to select the columns.

I don’t need i’m clicking and dragging on the column. Letters e through h in this case and then i’ll right, click on any one of them and select, delete and they’re gone and the rest of the data scoots over to take the place of what i deleted same with. Rows: click and drag to select 14 and 15 in this case right click on either one of those numbers and then choose delete in addition to inserting columns and rows and also deleting them, you can right, click on a column letter or a row number and choose Cut this is one way to move your data from one place to another in the spreadsheet. So now that i clicked cut, if you look very closely, you can see that the outline around that column has changed.
I want to insert it here before column d, so i’ll, right, click on d, choose, insert cut cells and it doesn’t erase the column that i set up for record labels. It just scoots it over to the right inserts a column to the left of it and, of course it also works with rows and even multiple rows. So in this case i selected 10 through 13. i’ll right click on any of the row numbers choose cut. I want to put this in alphabetical order in this case, so i’ll right, click on column, six, because i want it to appear before column six and i choose insert cut cells and all four of those rows now have moved up into the proper place. Now, there’s one other technique that i want you to know for inserting and deleting columns and rows in excel, and that is you really should know the keyboard shortcuts in excel anytime.
You can just keep your hands on the keyboard instead of moving from the keyboard to the mouse, you’re saving yourself time and hassle and you’ll find yourself being much more efficient in your use of excel. So, let’s look at how to do the same thing i showed earlier, but using just keyboard shortcuts, so i’m going to click somewhere in column d. I would like to add a column for stars, the number of stars that i think each of these albums deserves and i’d like that column, to appear before column d. So i clicked anywhere in column d, i’ll hold the ctrl key and tap spacebar that selects the entire column. Next i’ll hold ctrl hold shift and then tap the plus sign on the keyboard and i get a brand new column and then, of course i could go up here and give the column a heading of stars. Now, if i change my mind, i can just hold ctrl, tap, spacebar and then holding control.
Again i could tap minus on the keyboard and it deletes the column. I had added what about rows, i’d like to add another album by the killers, so i’m going to go anywhere in row number 22.. Instead of using the mouse to click, i could just use the arrow keys and there’s some other ways as well to navigate with just using the keys on the keyboard, but anywhere in row.
Number 22. Instead of ctrl spacebar. This time i need to hold shift and tap spacebar.
Why the difference? Because it’s a row not a column, now that that row is selected again i’ll hold ctrl hold shift tap the plus sign, and i get a brand new row above the row that i had selected and i can tap it a couple more times. Just tapping that plus sign to add enough columns so that i can put in the data that i need so now i can easily put in that data. It looks like i put in one too many rows.
That’S okay! I just use the arrow keys to get anywhere in row. Number 22. hold shift tap spacebar, i hold ctrl, and this time i tap minus and it removes the extra blank row that i don’t need.
So in this article, we’ve looked at three basic ways of adding columns and rows and also deleting columns and rows in your excel spreadsheets. Just the simple right-click method, including selecting and then right-clicking on, multiple rows or columns at the same time and then inserting blank columns or rows. And then we also looked at inserting a column or row and then just tapping the f4 key as many times as you need to to repeat that action and end up with the right amount of rows or columns. And then, finally, we looked at the keyboard shortcuts that will help you keep your hands on the keyboard and working efficiently in excel, adding and deleting columns and rows really is one of the most intimidating things about using excel for those that are just starting out learning To use the program, so i hope that this video has helped to clarify things so that you can confidently work with your data in microsoft, excel thanks for watching.
I hope you found this tutorial to be helpful. If you did please like follow and subscribe, and when you do click the bell so you’ll be notified. When i post another video, if you’d like to support my channel, consider clicking the thanks button below the video or you could support me through my patreon account or by buying channel merch and you’ll, find information about those options in the description below the video. Speaking of patreon, i want to give a quick shout out to my five dollar patreon supporters.
Thank you. So much for all you do to support the channel. I really appreciate your support. You .