Hi, this is Wayne again with a topic “Primitive Technology: Brick kiln, brick mold and bricks”.
An old brick mold made of fired clay from a previous video. Digging a pit to wash the mold in ( to stop mud sticking, ) Digging clay out of the mixing pit Dusting the mold, with wood ash to stop the clay sticking to it. Pressing the clay into the mold, Adding wood ash to the water makes it soapy and helps stop clay from sticking to the mold. This is where I get the clay from. It was a pig wallow that originated as a tree, throw ( a bowl like depression left by a fallen tree ). The clay was trod on by foot to save the hands getting overworked., While the bricks dried, better quality clay was obtained from the creek to make finer pottery., Crushing rock in a mortar to act as grog in the clay. When mixed into clay grog stops clay from Cracking as it dries.
Using the old brick mold as a template for the new brick mold., It’s handy to have a back up brickmold in case the main one breaks during large scale: brick production., Duplicated brick, mold awaiting firing, Also making a special rectangular pot to wash The new brick mold in between making bricks ( to stop the clay, sticking and forming irregular bricks. ) Making sure the mold fits into the washing pot, Making a water carrying pot, as there will be leftover space in the kiln good to have back up pots. In case of breakages. Turning the bricks, so they dry faster Nocturnal brick inspector.
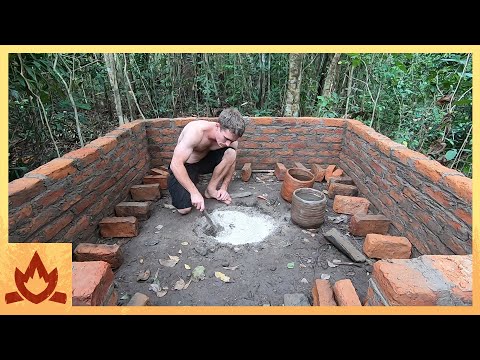
When the bricks are nearly dry, they are forced, dried next to a fire.. Clay needs to be bone dry before firing, or else it will explode as internal moisture changed to steam. Building the kiln. The bricks are dry stacked, like so to form a dual channel, firebox and single ware chamber.. It is a simple updraft, kiln design. Stacking, the bottom of the kiln, with bricks to be fired..
The fire hits the bricks first, which protects the more delicate pottery above.. The brick mold needs to be fired before it can make bricks ( lest it dissolve in the water ). It is covered with it’s own, washing pot, which doubles as a saggar during firing, ( protects it from temperature changes that might cause cracking ), Removing bricks to fit in water pots. Pots are put in upside down to trap the rising heat like a hot air balloon, allowing them to bake more effectively. Wood 75 cm long to fit into the two firebox channels.
Fire using the hand drill Starting the fire in the ash pit under each firing channel to dry the pottery slowly before the proper firing begins. Adding wood in the firing channels above the ash. Pits.
Wood can also be added at the back of the kiln. With this design for more even and faster firing., Note the good draft very little obstruction to flame path. Covering pots with bricks. This stops the flame rushing out the top too fast. Before firing, the pots. Keeps the heat in. Pottery/bricks, starting to glow red About 2 hours. In and it looks sufficiently hot. All the pottery needs to glow red hot to be water proof ( not dissolve in water, ) Pots ring nicely when tapped, indicating no cracks or weakness.. However, rectangle pot has a minor crack, as indicated by the hollow sound. Good, to see the new brick mold is intact, Fired bricks, Storing the bricks as a dry stacked wall before use at a later date. Water testing pots, No problems Testing the mold washing pot.

Once again, adding ash to make soapy water to stop clay sticking to the mold. Testing, the new brick mold, No problems. The workshop is now equipped to produce fired clay bricks. .